If you seek to unlock the potential of a powerful trifecta — Ktor, PostgreSQL, and Docker — in your pursuit of seamless deployment, you’ve come to the right place.
Today we embark on a journey revealing the art of deploying a Ktor-PostgreSQL server using Docker on Hostinger or any other server of your choosing
Part I: Laying the Foundations — PostgreSQL and Flyway — First, we shall lay the cornerstone of our server’s infrastructure. Using Docker, we set up a PostgreSQL database. To ensure seamless migrations, we shall use the help of Flyway.
Part II: Launching the Ktor Server — Docker at its Finest — Next we will look at deploying our code on a server using Docker and Docker Hub.
Part III: Reaching Zenith — Seamlessly Updating and Migrating — Finally we will learn the art of server updates and database migrations.
Part I: Laying the Foundations — PostgreSQL and Flyway
In this article we won’t delve into the intricate details of Docker, Flyway, PostgreSQL or Ktor — there’s already a wealth of knowledge on each. Instead, we focus on the art of combining these powerful technologies together.
If you haven’t already, install docker following these instructions: https://docs.docker.com/engine/install/
We begin by containerising our ktor project and creating a Dockerfile in the root of our ktor project directory. This docker configuration is for our local machine, we’ll look at docker configuration for the server when we setup our server.
This will build our project and generate a .jar file through the buildFatJar Gradle task.
FROM gradle:7-jdk11 AS build
COPY --chown=gradle:gradle . /home/gradle/src
WORKDIR /home/gradle/src
RUN gradle buildFatJar --no-daemon
Next, We need to create a docker-compose.yml file in the root of our project with two services one for the database and the other for ktor server.
For the database service, we’ll be utilizing PostgreSQL, and thus, the appropriate image to be used is postgres. It is worth noting that if you are working on an Apple M1 machine, you must specify the platform as linux/amd64 to ensure compatibility. However, if your server does not utilize the M1 chip, this specification won’t be necessary. Next, we also need to provide a name for our database container, along with defining volumes, ports, and a health check. We pass sensitive information, such as the database name, username, and password, securely using a .env file.
services:
  db:
    image: postgres
    platform: linux/amd64
    restart: always
    container_name: backend-db
    volumes:
      - pg-volume:/var/lib/postgresql/data
    env_file:
      - postgres.env
    ports:
      - "5432:5432"
    healthcheck:
      test: [ "CMD-SHELL", "pg_isready -U $$POSTGRES_USER -d $$POSTGRES_DB" ]
      interval: 5s
  ktor:
    build: .
    platform: linux/amd64
    container_name: backend-ktor
    restart: always
    ports:
      - "8080:8080"
    env_file:
      - postgres.env
    depends_on:
      db:
        condition: service_healthy

volumes:
    pg-volume: {}
For the ktor service, we will build the ktor project and specify the configuration, such as linux/amd64 architecture, container name, ports. Finally, we pass the same .env file to our ktor project as used in database service for it to connect to the database and perform read/write operations.
To pass the database name, user, and password, we create a .env file in the root directory of the project. Which looks like this:
POSTGRES_DB={DATABASE_NAME}
POSTGRES_USER={DATABASE_USER_NAME}
POSTGRES_PASSWORD={DATABASE_PASSWORD}
Obviously, you have the flexibility to add more values to the .env file, including ports, drivers, and other configurations, as needed. We then read the values in our ktor project using the application.conf file as such:
ktor {
    deployment {
        port = 8080
        port = ${?PORT}
    }
    application {
        modules = [ com.way.ApplicationKt.module ]
    }
}

storage {
    driverClassName = "org.postgresql.Driver"
    jdbcURL = "jdbc:postgresql://db:5432/"${POSTGRES_DB}
    user = ${POSTGRES_USER}
    password = ${POSTGRES_PASSWORD}
}
That concludes the setup for Docker on our local machine. Next, we look at database migrations.
In line with Duncan McGregor’s wisdom — “Nobody ever got fired for using Flyway,” we opt for Flyway as our trusted tool for handling database migrations.
Let’s start by adding flyway to our ktor project. You can also follow this quick start documentation from Flyway: https://documentation.red-gate.com/fd/quickstart-api-184127575.html
implementation("org.flywaydb:flyway-core:9.20.1")To create our database tables, we use Flyway instead of Exposed or H2. We do this by creating a migration file named V1__Create_database_table.sql This file is placed under the path src/main/resources/db/migration which enables Flyway to recognize and execute the necessary database changes.
create table if not exists public."user"
(
    email          varchar(128),
    first_name     varchar(64)  not null,
    last_name      varchar(64)  not null,
    phone_number   bigint       not null
    primary key,
    date_of_birth  date,
    date_of_signup date         not null,
    password       varchar(256) not null,
    salt           varchar(256) not null
);

alter table public."user"
    owner to {DATABASE_USER_NAME};
The next step is establishing a connection between Flyway and our database by retrieving the required values from the application.conf file and invoking the migrate() function, which will identify the latest migration file and implementing the necessary alterations in our database. Typically, the initial version of the migration file is dedicated to creating the tables in the database. We can then connect to our database using either exposed or any other ORM and perform db operations.
object DatabaseFactory {
    fun init(config: ApplicationConfig) {
        val driverClassName = config.property("storage.driverClassName").getString()
        val jdbcURL = config.property("storage.jdbcURL").getString()
        val dbUser = config.property("storage.user").getString()
        val dbPassword = config.property("storage.password").getString()

        val flyway = Flyway.configure().dataSource(jdbcURL, dbUser, dbPassword).load()
        flyway.migrate()

        Database.connect(url = jdbcURL, user = dbUser, password = dbPassword, driver = driverClassName)
    }

    suspend fun <T> dbQuery(block: suspend () -> T): T =
        newSuspendedTransaction(Dispatchers.IO) { block() }
}
At this point, we are all set to run the docker compose up command in our project directory. This will trigger the download and setup of the PostgreSQL image, build our Ktor project, and seamlessly create the necessary database tables through Flyway. By executing this single command, we can effortlessly orchestrate the entire process, ensuring that our application environment is up and running smoothly with the database fully configured and ready for use in our local machine.
Part II: Launching the Ktor Server — Docker at its Finest
In this article, we explore the step-by-step process of configuring our server, as well as pushing our Ktor project to DockerHub. We look at setting the necessary Docker configurations to push the image to the DockerHub. Subsequently, we detail the process of pulling the latest image from DockerHub onto our server and initializing the Ktor server. By following this comprehensive guide, you’ll be equipped to deploy your Ktor project with ease and efficiency.
Server setup
Let’s begin by establishing a connection to our Virtual Private Server (VPS) using SSH. For Mac users, follow these steps: Navigate to your user’s folder and locate the .ssh folder. Once there, open the terminal and enter the following command:
ssh-keygen -m PEM -t rsaThis will prompt you to enter a filename; provide any relevant file name of your choice. When prompted for a passphrase, simply press “Enter” to proceed without setting a password. Finally, you’ll end up with two files: one with a .pub extension and another without it. Next, copy the content of the .pub file and paste it into your VPS SSH configuration:
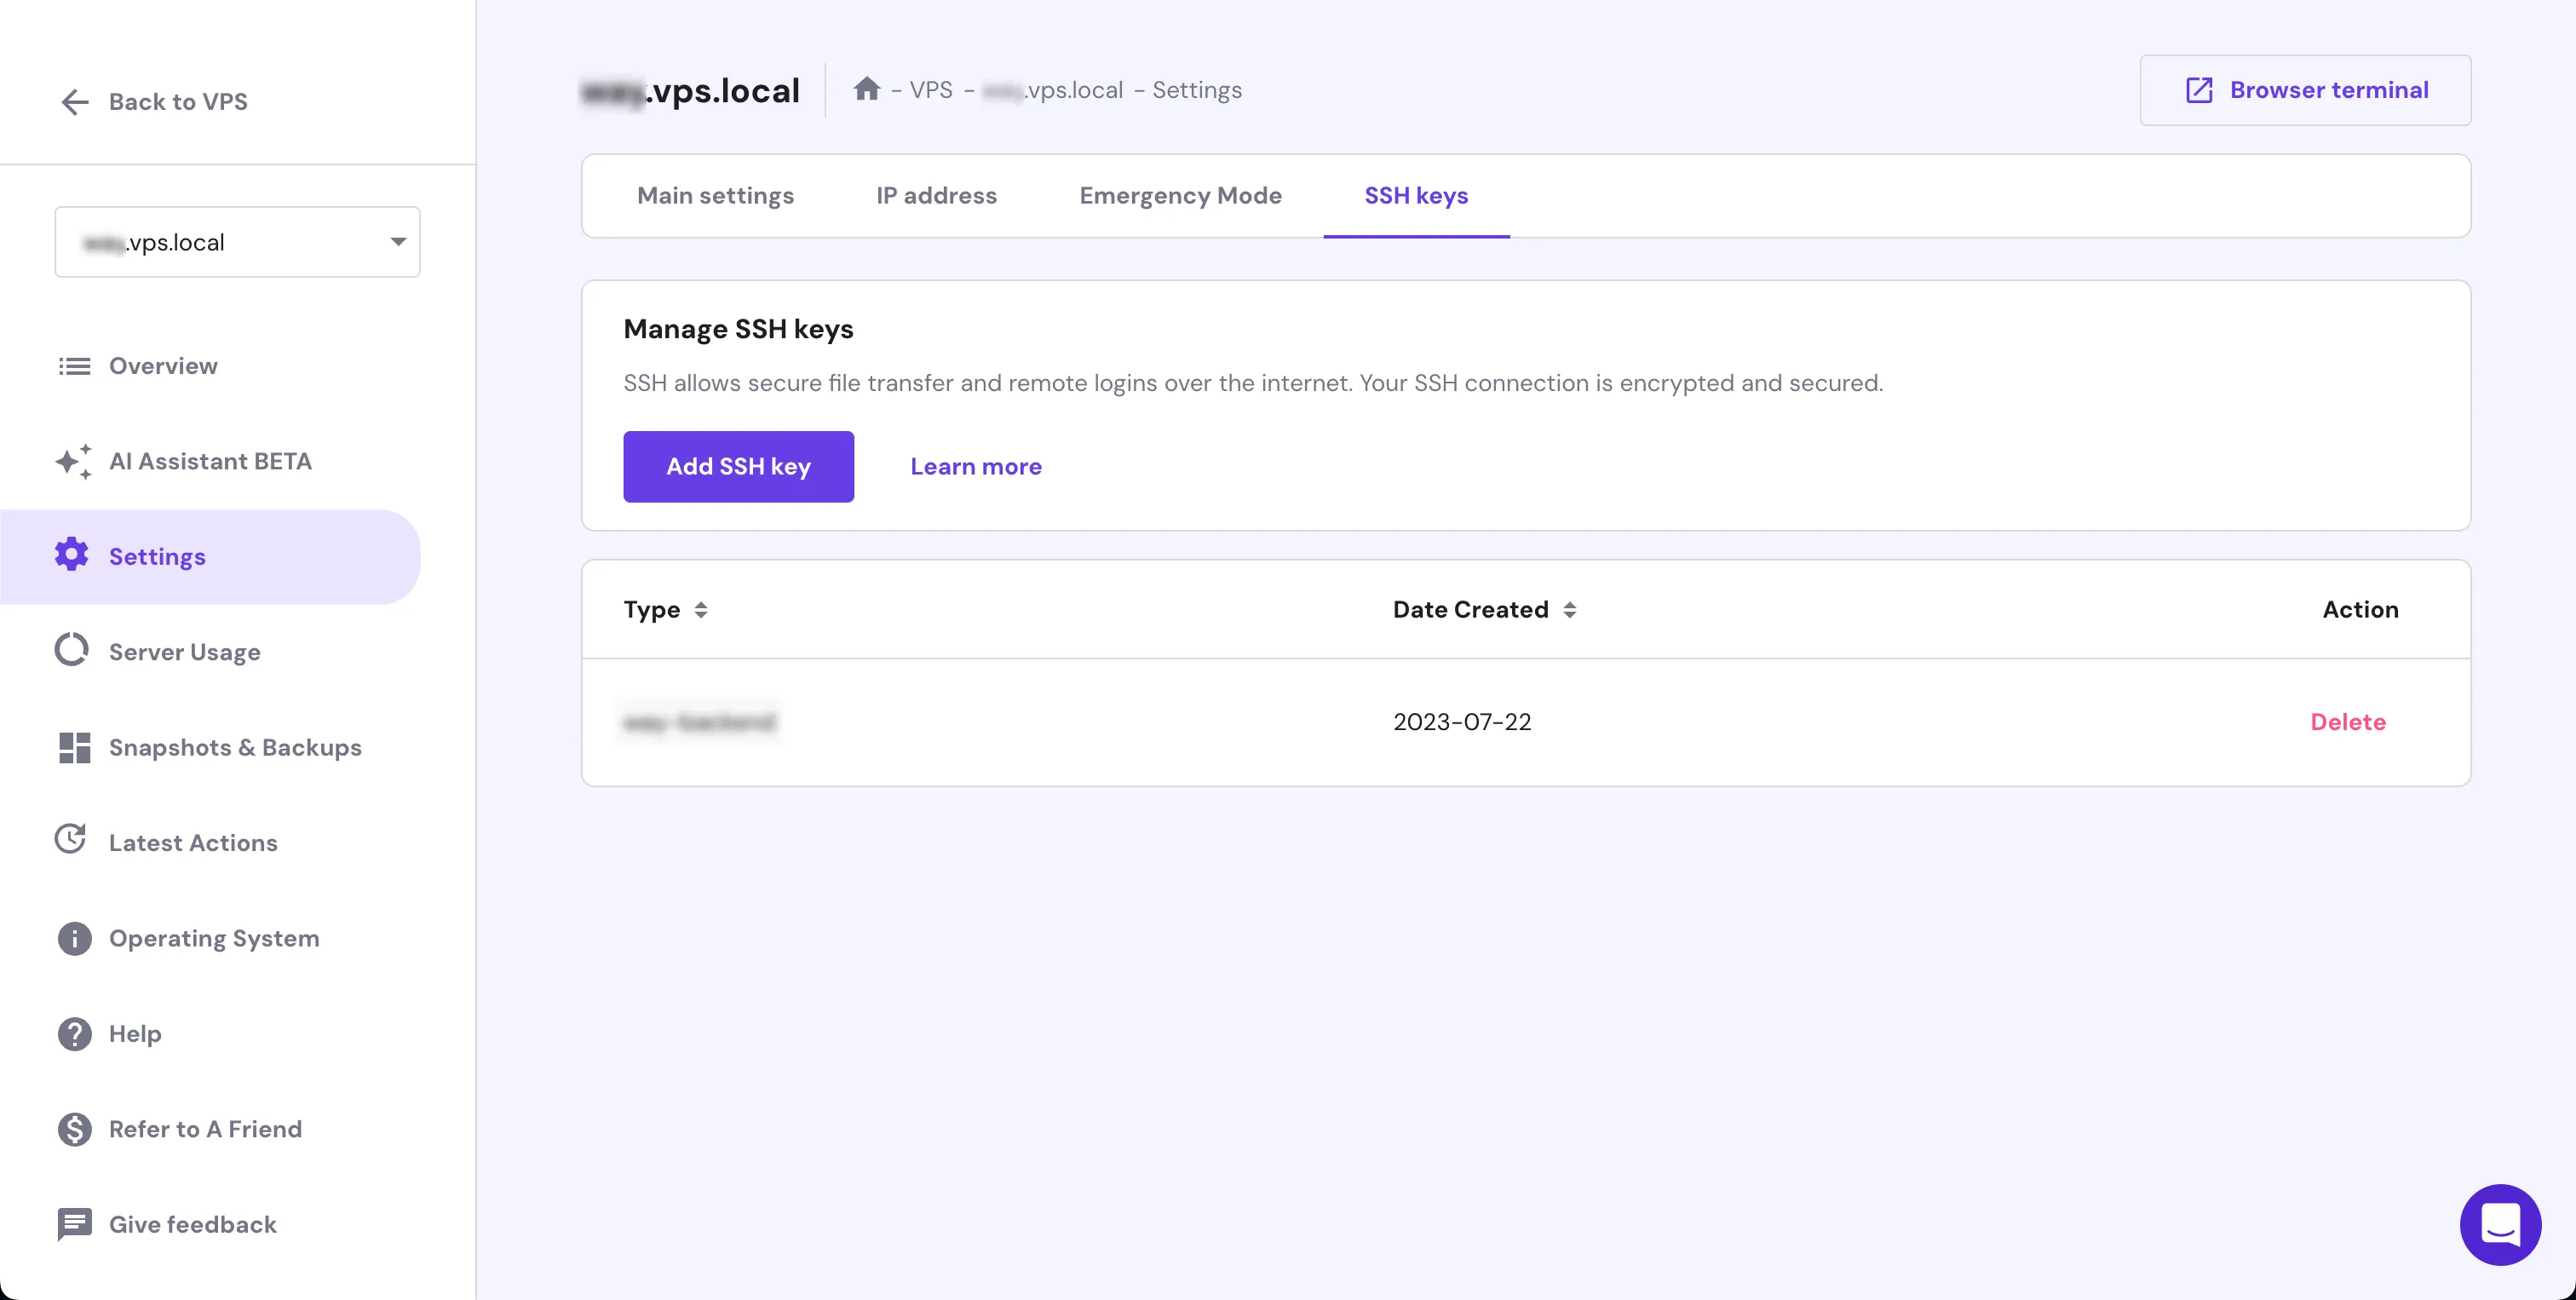
Now, you should be able to connect to the VPS with your terminal using the ssh -i <keyname> <username>@<host> command, where <keyname> represents the filename of the generated file without the .pub extension, commonly known as the private key.
Once connected to the server, the first task is to update all dependencies using the apt update command. Following this, we proceed to install JAVA with the apt-get install default-jdk command. The subsequent step involves installing Docker on our server, facilitating seamless containerization and deployment.
Install docker following these instructions: https://docs.docker.com/engine/install/
Let’s begin by creating an empty private repository in Docker Hub to facilitate pushing our ktor images and pulling the latest image onto our server.
Next, let’s create a dedicated directory for our project using the mkdir command. For instance, mkdir app will create a directory named “app,” which we will navigate into for our setup.
Within this project directory, we need to create three essential files: Dockerfile, docker-compose.yml, and postgres.env. We start using the nano Dockerfile command, which will open a text editor. Paste the following content into the editor, keeping in mind that the SERVER_DIR represents the directory created earlier, which is “app” in this case. Save the file with Ctrl+S and exit the editor with Ctrl+X.
FROM openjdk:11
EXPOSE 8080:8080
RUN mkdir /{SERVER_DIR}
ENTRYPOINT ["java", "-jar", "/{SERVER_DIR}/{SERVER_NAME}.jar"]
Next, let’s create the docker-compose file using the nano docker-compose.yml command and insert the following content. It mirrors the structure of our local docker-compose file, with the only difference being the ktor image version, where we specify the our DockerHub username and the repository name we created earlier.
services:
  db:
    image: postgres
    restart: always
    container_name: backend-db
    volumes:
      - pg-volume:/var/lib/postgresql/data
    env_file:
      - postgres.env
    ports:
      - "5432:5432"
    healthcheck:
      test: [ "CMD-SHELL", "pg_isready -U $$POSTGRES_USER -d $$POSTGRES_DB" ]
      interval: 5s

  ktor:
    build: .
    image: {DOCKER_HUB_USERNAME}/{DOCKER_HUB_REPO}:{LATEST_VERSION}
    container_name: backend-ktor
    restart: always
    ports:
      - "8080:8080"
    env_file:
      - postgres.env
    depends_on:
      db:
        condition: service_healthy

volumes:
  pg-volume: {}
Now, let’s create the final file, postgres.env, using the nano postgres.env command. In this file, add your database credentials, which might be different from your local database credentials. It’s essential to ensure a more secure password for the database on the server. Input the required details to establish a secure connection. Once done, save the file with Ctrl+S and exit the editor with Ctrl+X.
POSTGRES_DB={DATABASE_NAME}
POSTGRES_USER={DATABASE_USER_NAME}
POSTGRES_PASSWORD={DATABASE_PASSWORD}
Now, to enable the pulling of private repositories from Docker Hub, we must log in to Docker using the docker login command. This step ensures that we have the necessary access to retrieve private images for our server setup.
With our server fully prepared, the next step is to pull our Docker image. Upon doing so, the Ktor server should be up and running. However, before we execute the pull, we need to ensure our image is available in a suitable repository, which, in this case, will be the one we created earlier on Docker Hub.
Configuring the Ktor Project
To configure Docker for pushing our Ktor project to Docker Hub, we need to make adjustments to our build.gradle.kts file with the following configurations under the ktor block:
ktor {
    fatJar {
        archiveFileName.set("{PROJECT_NAME}-$version-all.jar")
    }
    docker {
        jreVersion.set(io.ktor.plugin.features.JreVersion.JRE_17)
        imageTag.set("${project.version}")
        externalRegistry.set(
            io.ktor.plugin.features.DockerImageRegistry.dockerHub(
                appName = provider { "{DOCKER_HUB_REPO}" },
                username = providers.environmentVariable("DOCKER_HUB_USERNAME"),
                password = providers.environmentVariable("DOCKER_HUB_PASSWORD")
            )
        )
    }
}
Note: Ensure that the {DOCKER_HUB_REPO} matches the repository name on DockerHub.
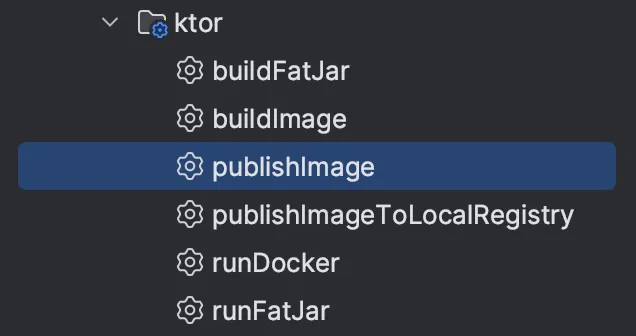
These configurations enable Docker to push our Ktor project’s Docker image to the specified private repository on DockerHub. Also, it allows the version of the image to be tagged appropriately for version control. With our Docker configurations in place, pushing our Ktor project to DockerHub becomes a breeze. The publishImage Gradle task handles the entire process with a single click.
Deploying Ktor Project to the Server
Let’s return to our server via SSH, navigate to the previously created project directory. Run the following command to pull the latest image from your Docker Hub repository into the server:
docker pull {DOCKER_HUB_USERNAME}/{DOCKER_HUB_REPO}This ensures that the server has the most up-to-date image available for our project. Now, we can initiate our Ktor server using the following command:
docker compose up -dWith the -d flag, Docker Compose runs the process in the background, allowing our server to operate smoothly without terminal interference. This command will create the PostgreSQL database, initialize our Ktor server, and then execute database table creation using Flyway.
Finally! our server is now up and running, fully equipped to handle requests efficiently and effectively.
Part III: Reaching Zenith — Seamlessly Updating and Migrating
In this article, we delve into the process of updating our server with the latest code changes. We explore the crucial aspect of database updates, commonly referred to as database migrations. Finally, we address how to efficiently view logs from our Ktor project in the server environment
Updating the Server with Latest Code Changes
Pushing our latest code changes to the server is similar to deploying for the first time minus the setup. To proceed, let’s push the latest version of our Ktor project to the server by executing the publishImage Gradle task. This task will build our Ktor project and push the updated image to DockerHub.
After successfully building and pushing the image, we can connect to our server using SSH. Once connected, we pull the updated image from DockerHub with the command:
docker pull {DOCKER_HUB_USERNAME}/{DOCKER_HUB_REPO}Having pulled the latest image, we navigate to the project directory where the docker-compose.yml file resides.
docker compose up -dBy running the above command, we recreate the Ktor server, implementing the latest changes in the background. With this, our Ktor server is now up-to-date with the latest code changes and efficiently running on the server.
Managing Database Migrations
Now, let’s take a brief look at database migrations. Suppose we want to modify the data type of the “email” column from varchar(128) to “text” in the users table created in Part 1. To achieve this, we must create a new file under the src/main/resources/db/migration path and name it V2__Create_database_table.sql The critical element here is the prefix “V2__” which is incremented from our previous file, while the subsequent name can be chosen freely.
In the newly created V2__Create_database_table.sql file, we’ll include the necessary SQL query to change the data type as per our requirement.
ALTER TABLE user MODIFY email TEXTAnd that’s all there is to it! Now, to deploy our latest changes, we follow the procedure described at the beginning of this article. Flyway will seamlessly manage the database migration, ensuring a smooth and successful transition
You can also follow this quick start guide for flyway: https://documentation.red-gate.com/fd/quickstart-api-184127575.html
Viewing Logs from our Ktor Project
Now, we have the capability to attach to our Ktor container and tail logs using the container name we defined in the docker-compose.yml file we setup in Part II. To do this, run the following command:
docker logs -f --tail 100 backend-ktorIn this command, 100 represents the number of the last log lines you wish to view. You can adjust this number based on your specific requirements. By executing this command, we gain access to all network and database logs from the Ktor container.
To de-attach from the container and return to the terminal, simply press Ctrl + C.